
Written by Jason Xie on June 13, 2022.
This Portfolio Site
My portfolio website to showcase things I've worked on.
After over a hundred job applications and countless of rejections, I’ve come to the realization after some research that I need to have a portfolio website with projects to demonstrate that I have the skills to be a web/software developer, or at least increase my hire-ability compared to just having a resume and cover letter. As a result, this website that you are reading from right now came to fruition.
Contents
The Goal
The main goal for this portfolio website is to show the projects that I’ve worked on to hiring managers and help them in their decision on whether to hire me. Therefore, I wanted to keep the look and feel of this website as simple as possible. All I want on this portfolio is a little detail about myself and a collection of projects that I can easily add to as I build more.
The design of this portfolio website was inspired by Tania Rascia’spersonal website. I thought the design was very simple, minimal, and neat which is exactly what I want for my own website.
I also wanted my portfolio to be light and fast since its only purpose is just to display information, a.k.a. a static website.
How I Built It
1. Mock Up
To get a basic idea of how I wanted my portfolio website to look before building it, I decided to mock up the portfolio website in Figma.

The end-result is not exactly the same but similar. The goal was just to get a basic idea.
2. Deciding On Which Technologies To Use
As previously mentioned, I wanted my portfolio to be light and fast as all I will be displaying is static information which means that I need to use a static site generator. Initially, I was going to go with GatsbyJS since I planned on using ReactJS as well. However, I ended up going with Astro instead because it claims to load significantly faster than Gatsby due to a feature called partial hydration. In addition, Gatsby also uses the GraphQL API to handle site content which I think is not necessary. However, GraphQL is a technology I plan to learn soon.
Using ReactJS as my framework was a no-brainer as that is what I’m most familiar with.
To style my website, I decided to go with TailwindCSS as it is a low-level CSS framework which allows me to style my components and pages exactly how I want it. In addition, TailwindCSS offers the ability to easily enable dark mode themes with a single class of “dark” added to the HTML element
To deploy my portfolio, I decided to go with Netlify due to their generous free plan.
3. Begin Building
Once I’ve figured out what technologies to use, it was time to begin building. The following are some highlights of developing the portfolio:
3.1 Navbar Component
I started with building the navbar component as I thought it would be the most challenging due to the dark mode toggle button I planned to add. This is where I learned about partial hydration. My ReactJS components would not work as Astro generates every page with zero client-side Javascript by default. However, to allow interactive UIs such as React components, Astro uses a technique called partial hydration to hydrate individual components on the page to only send the absolutely essential Javascript to the page.
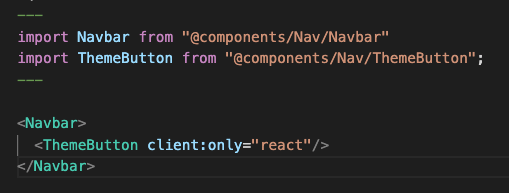
In the NavBar component, the theme button is an interactive UI and therefore, I need to tell Astro to hydrate it with client:only="react".
The theme toggle button was implemented using React hooks useState and useEffect. I used Astro’s documentation example as a guide but I used <input type="checkbox"> instead of radio buttons. My solution for the theme button can be found here.
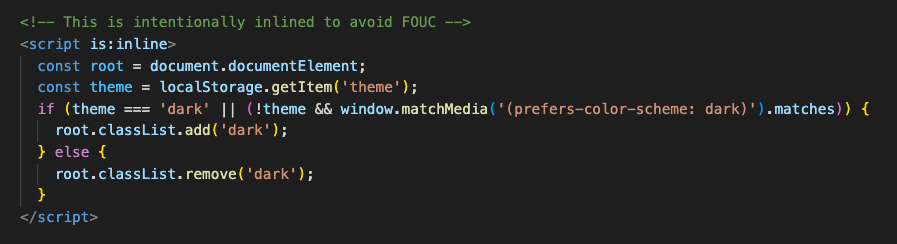
Also, in order to avoid Flash of unstyled content(FOUC), include logic in a <script> tag within the <header> to determine the last theme that is saved in the localStorage so that the correct HTML styling is generated at build time.
3.2 Managing Projects
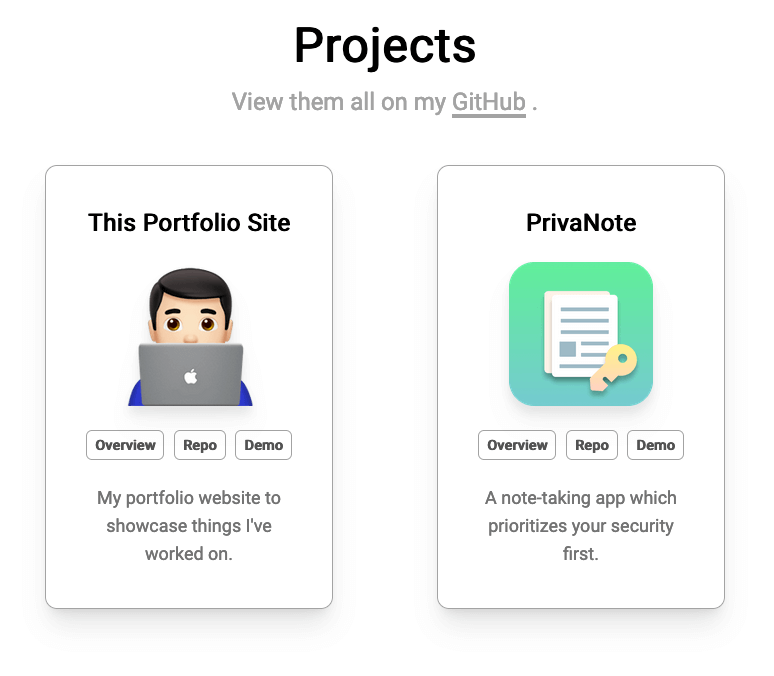
As previously mentioned, I wanted to show a collection of projects that I can easily add to as I build more. So I utilized components to easily add a project and Astro Markdown layouts to write about the projects.
Here would be my development workflow when I need to add a project to my portfolio:
-
Add a
<Project />component with props to describe it to theprojects.astropage.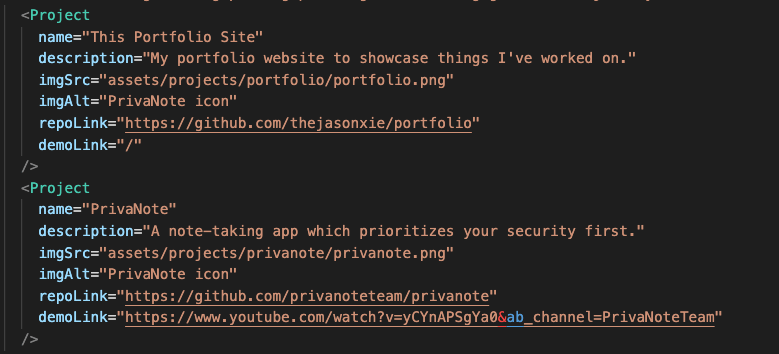
Which results in this:
-
Create a Markdown file with the same name as what was given to the
<Project />component in lowercase-kebab-case in the projects directory within the pages directory. For example, if the name given to the<Project />component was “This Portfolio Site”, the markdown file would be named “this-portfolio-site.md”. -
Define the props to be used by the Project Layout that will host the markdown content at the top of the created markdown file.
- Write about the project in markdown which generates a page like the one you are currently reading.
3.3 About Me
In addition to projects, I added a little information about myself, ways to contact me, and ways to access my resume in the About me page.
What I find neat about this page is the resume section where an option to view and download the resume is provided.
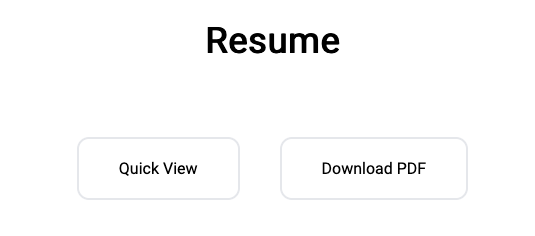
The Quick View button displays my resume in html format that looks exactly like the resume in PDF format.
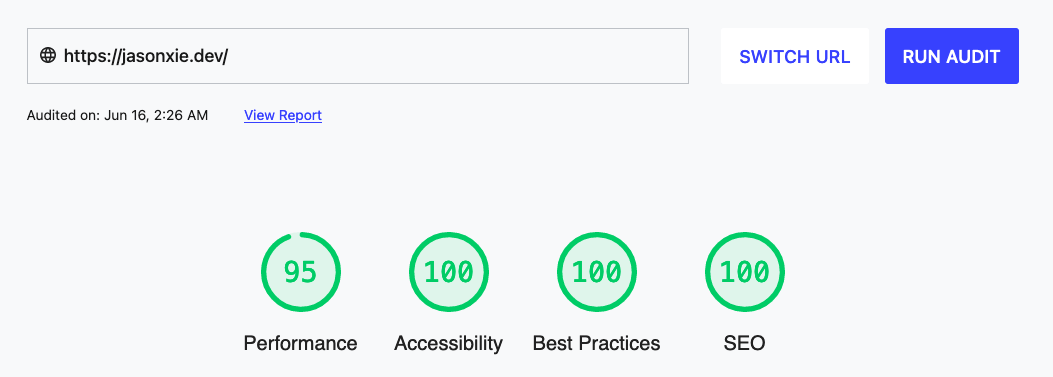
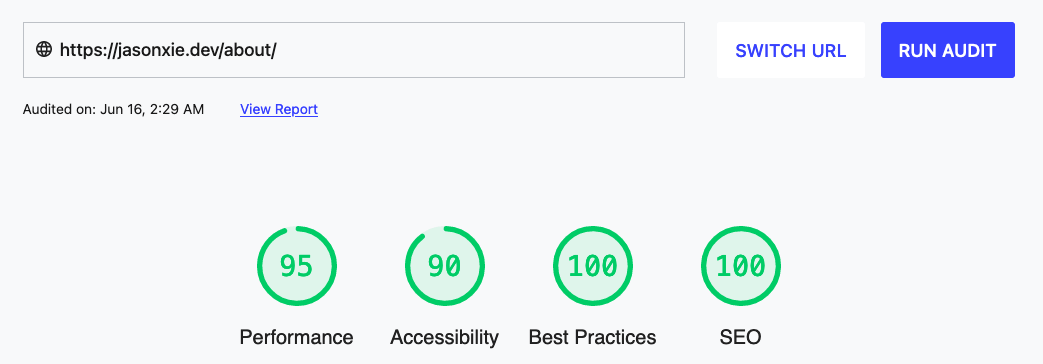
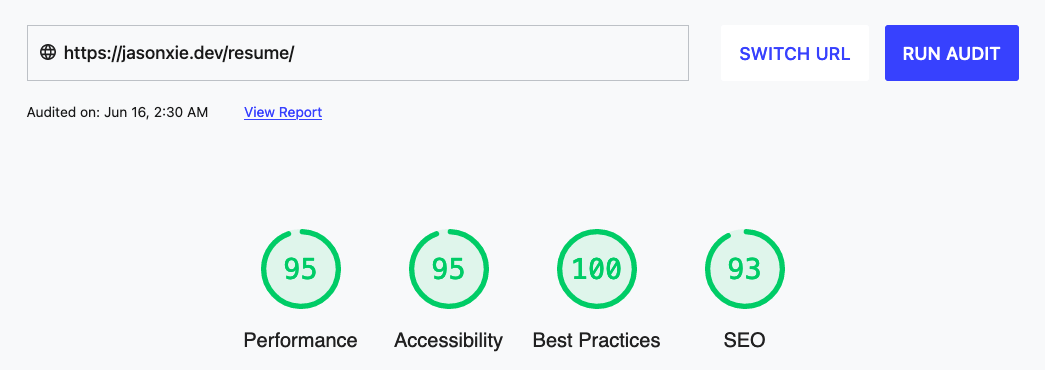
Performance Review
To test out the performace of my portfolio, I used the Measure tool provided by web.dev. Below are the audits for all the pages on my portfolio.


Future Fixes
As of right now, Astro does not have a first-party solution for optimizing images like Gatsby does with gatsby-plugin-image but instead, recommends to use astro-imagetools.
However, because Astro is still in beta and will soon have its official release, I opted not to use any third-party integrations but instead, manually compress my images with TinyPNG.
Astro plans to implement an Image component, possibly using vite-imagetools, after their V1.0 official release as outlined in their roadmap.